Revit Tutorial – Copying Drafting Views Between Projects

Subscribe to this channel: https://bit.ly/3VFqR86
Website: https://bit.ly/3VPUnrJ
__
__
Social Media
Instagram: https://bit.ly/3J8l6Io
Personal Instagram: https://bit.ly/3TMWZnD
Pinterest: https://bit.ly/43LlPc1
Houzz: https://bit.ly/3xm04DE
__
__
What’s in my Bag? Check out my KIT!!
https://bit.ly/3PQtFeC
Camera – https://bit.ly/3POwEEH
Tech – https://bit.ly/43I2hFH
Drawing Tools – https://bit.ly/4aE5YOM
—
—
Copying Drafting Views Between Projects in Revit
Introduction
This tutorial provides a detailed guide on how to copy drafting views between projects in Revit. Drafting views are crucial for detailing projects, and knowing how to efficiently transfer them between different projects can save time and maintain consistency. The video explains key steps such as matching view scales, copying content, and adjusting view titles. It also covers organizing the copied views into categories and phases for better project management.

1. Creating a New Drafting View
Before copying content from one project to another, a new drafting view must be created in the destination project. Ensuring that the scale matches between the two views is essential for maintaining consistency.

Key Steps:
Go to the View tab / New Drafting View in the destination project.
Set the drafting view scale to match the original view (e.g., 1 inch = 1 foot).
Temporarily name the drafting view (e.g., “Drafting View 1”).
Matching the scale is crucial for ensuring that elements from the original drafting view paste correctly.

2. Copying the Drafting View Content
After setting up the new drafting view, you can copy the content from the original project. In Revit, copying drafting views requires using the Copy tool and then pasting the elements into the new view.

Key Steps:
In the original project, select the content of the drafting view (e.g., insulation, text, detail items).
Click Copy and return to the new drafting view.
Use Paste / Align to Current View to transfer the elements.
Make sure that both views share the same scale to avoid alignment issues when pasting the content.

3. Adjusting the Title on Sheet
One useful tip shown in the video is how to customize the Title on Sheet. This allows you to display a different name for the drafting view on the sheet than the internal project name.

Key Steps:
Copy and paste the original title into the new drafting view.
Adjust the Title on Sheet to display a customized name, like “1-Hour Fire Rated Wall,” while the project name remains descriptive (e.g., “Wall Interior Code WI”).
This feature is helpful for differentiating between technical naming conventions in the project and clear descriptions for presentation on sheets.

4. Organizing Drafting Views in the New Project
Once the drafting view is copied, it’s important to organize it within the project by assigning it to the correct view category and design phase. This ensures that all views are properly categorized and can be easily located in the project browser.

Key Steps:
Assign the drafting view to a category (e.g., Walls) and a design phase (e.g., Construction Drawings).
This organization helps manage multiple views and phases in larger projects.
Conclusion
Copying drafting views between Revit projects is a simple but powerful process that ensures consistency and efficiency. By matching scales, copying the content carefully, adjusting titles, and organizing views by category and phase, users can streamline their workflows and maintain clarity across different projects. These techniques are especially useful in complex projects with multiple details and views.
more insights

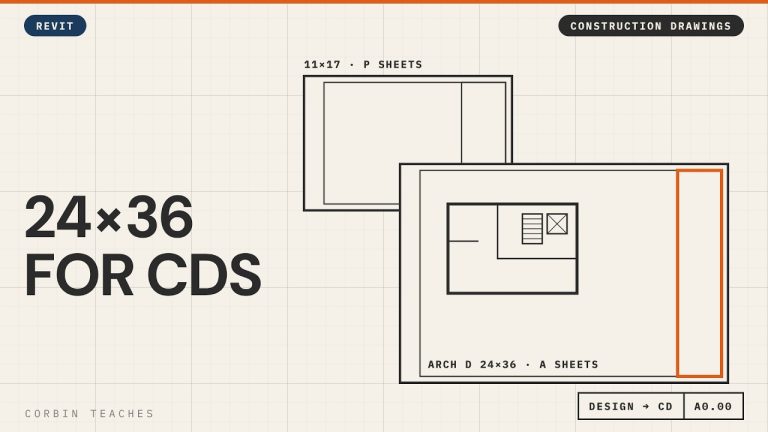
Change the Title Block to Arch D 24×36 — Revit

Change a Revit sheet to an Arch D (24×36) title block and keep your design sheets and construction sheets in the same file. I renumber the 11×17 design sheets from A to P with pyRevit, create new A sheets, then load and edit the Autodesk D title block to 24×36 with a 1″ binding margin.

In this video:
• Two sheet sets in one model: P sheets (11×17 design) and A sheets (Arch D construction)
• Renumber sheets in bulk with pyRevit’s ReValue tool
• New sheet A0 Cover Page
• Load the D 22×34 title block from the Autodesk library and resize it to 24×36
• Margins: 1/2″ all round, 1″ on the binding edge
• Remove the Autodesk logo and consultant boxes, keep the revision schedule
• Save it to your own family library and swap the title block on the sheet

⏱ CHAPTERS
00:00 Design sheets vs construction sheets
00:35 Renumber the design sheets to P
01:07 Bulk renumber with pyRevit ReValue
01:45 New A sheet for the cover page
02:18 Load the Arch D title block
03:12 Resize the title block to 24×36
04:02 Margins and the binding edge
04:34 Remove the logo and consultant boxes
04:51 Save it and swap it on the sheet

▶ DESIGN TO CONSTRUCTION DRAWINGS
Part 2, design, CD and working views: https://youtu.be/g4AHt1J606k
Part 3, revision clouds and issues: https://youtu.be/Y9e53z65nV0

#Revit #RevitTutorial #BIM

━━━━━━━━━━━━━━━━━━━━━━
🔗 FREE & PAID RESOURCES
━━━━━━━━━━━━━━━━━━━━━━
📁 Notion Business OS for Architects (my most popular template):
https://cpd.gumroad.com/l/civaw?utm_source=youtube&utm_medium=description

📁 Free Notion Issue Tracker for Architects:
https://cpd.gumroad.com/l/cjlls?ref=yt-arch-d-title-block

🌐 More Revit tutorials: https://corbinteaches.com

━━━━━━━━━━━━━━━━━━━━━━
CONNECT
━━━━━━━━━━━━━━━━━━━━━━
Subscribe: https://bit.ly/3VFqR86
Instagram: https://bit.ly/3J8l6Io
Architecture work: https://bit.ly/3VPUnrJ

Read more >

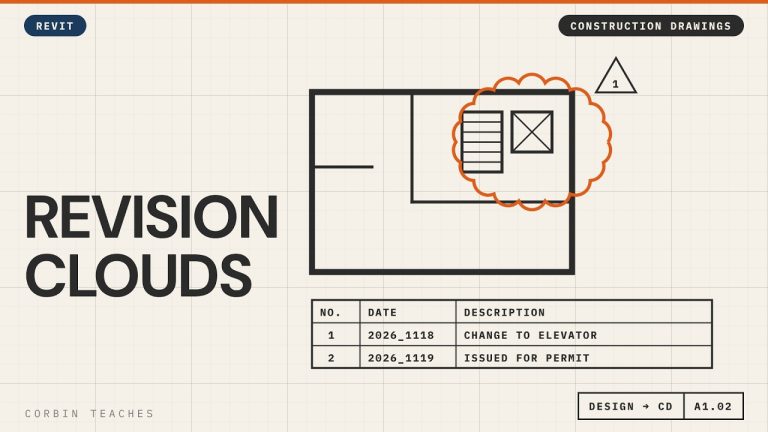
Add Revision Clouds and Issue Sheets for Permit — Revit

Add revision clouds in Revit, make them red, and issue a set for permit without clouding every view. I place a cloud from the Annotate tab, set up the revision in View › Revisions, change the cloud and tag colour in Object Styles, then add an “Issued for Permit” revision to every sheet at once.

In this video:
• When to start using revisions (after design approval)
• Annotate › Revision Cloud, and where it shows up on the title block
• View › Revisions: date, description, Cloud and Tag vs Tag Only, Issued
• Why Issued locks the cloud
• Make clouds and revision tags red: Manage › Object Styles › Annotation Objects (not Line Styles)
• A revision with no cloud: Issued for Permit
• Add it to many sheets at once: select sheets › Revisions on Sheet

⏱ CHAPTERS
00:00 Why use revision schedules
00:56 Draw a revision cloud
01:27 Set up the revision in View › Revisions
02:13 Issued locks the revision
02:30 Make revision clouds red
03:38 Issue a set without clouds
04:23 Add the issue to many sheets at once
05:30 Cloud plus issue on the title block

▶ DESIGN TO CONSTRUCTION DRAWINGS
Part 1, Arch D title block: https://youtu.be/kI_12LX83co
Part 2, design, CD and working views: https://youtu.be/g4AHt1J606k

#Revit #RevitTutorial #BIM

━━━━━━━━━━━━━━━━━━━━━━
🔗 FREE & PAID RESOURCES
━━━━━━━━━━━━━━━━━━━━━━
📁 Notion Business OS for Architects (my most popular template):
https://cpd.gumroad.com/l/civaw?utm_source=youtube&utm_medium=description

📁 Free Notion Issue Tracker for Architects:
https://cpd.gumroad.com/l/cjlls?ref=yt-revision-clouds-issue

🌐 More Revit tutorials: https://corbinteaches.com

━━━━━━━━━━━━━━━━━━━━━━
CONNECT
━━━━━━━━━━━━━━━━━━━━━━
Subscribe: https://bit.ly/3VFqR86
Instagram: https://bit.ly/3J8l6Io
Architecture work: https://bit.ly/3VPUnrJ

Read more >

Model a Sloped Site from a PDF Survey — Revit

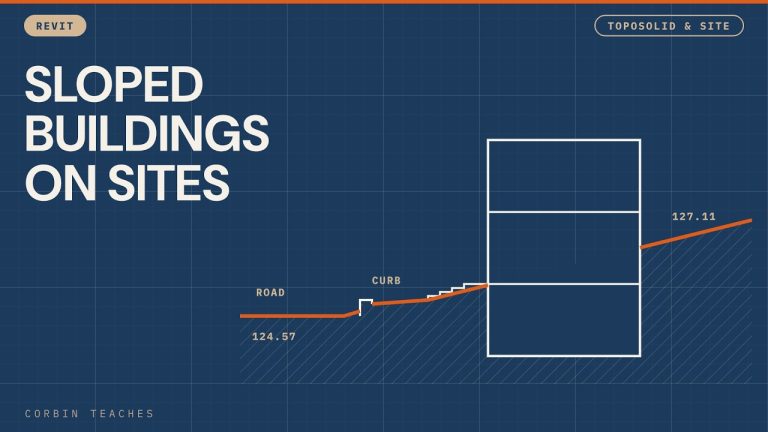
Model a sloped urban site in Revit, starting from a PDF survey. I import and scale the PDF, build a toposolid from the survey spot elevations (about 2.5 m of fall across the lot), drop the site to a working level with the survey point, then add the road, sidewalk, a custom curb and stairs that meet the grade.

In this video:
• Import the PDF at 300 DPI and scale it with a 10 m dimension (metric survey in an Imperial project)
• Toposolid past the property line so you have context for renderings
• Add Point with Absolute elevations, and switching units to metres while you click points
• Move the survey point and offset the toposolid so the site sits near Level 1
• Let Revit do the math: type =128.4-126.5 in an elevation field
• Quick property lines (and why you should use bearings and distances)
• Sub-divide the road and set it to asphalt, raised slightly above grade
• Sidewalk as a floor with Pick Lines, then shape it to the slope with Modify Sub Elements
• Edit the Thickened Slab Edge profile into a curb with a reveal and rounded edges
• Stairs from the sidewalk up to the floor, with one extra riser so the top tread meets the slab
• A floor as a transition piece between the sidewalk and the stairs
• Environment for Revit: shape a floor to the toposolid

⏱ CHAPTERS
00:00 A site with a 2.5 m grade change
00:39 Import the PDF survey
01:02 Scale the PDF
02:35 Toposolid past the property line
03:19 Add points at absolute elevations
06:10 Bring the site down with the survey point
09:19 Let Revit do the math
10:12 Sketch the property lines
11:12 Sub-divide the road as asphalt
13:42 Sidewalk as a floor
18:08 5″ concrete sidewalk type
19:11 Shape the sidewalk to the grade
21:33 Slab Edge for the curb
22:16 Draw the curb profile
25:27 Load the curb and set the type
28:17 Building set into the slope
29:01 Stairs from grade to the floor
31:01 Transition floor at the stairs
33:45 Environment for Revit: floor to topo

▶ MORE TOPOSOLID & SITE
Sidewalk curb with a custom slab edge: https://youtu.be/lxnMa_H3UMY
Create toposolids and sloping terrain: https://youtu.be/QDorK4ib9vs
Sloped topography and stone steps: https://youtu.be/NbaSLRGHhJw
Property lines and site plan: https://youtu.be/sauTm8wf3Eo
Point cloud to toposolid (Environment plugin): https://youtu.be/Npw_hHhZVYU

#Revit #RevitTutorial #BIM

━━━━━━━━━━━━━━━━━━━━━━
🔗 FREE & PAID RESOURCES
━━━━━━━━━━━━━━━━━━━━━━
📁 Notion Business OS for Architects (my most popular template):
https://cpd.gumroad.com/l/civaw?utm_source=youtube&utm_medium=description

📁 Free Notion Issue Tracker for Architects:
https://cpd.gumroad.com/l/cjlls?ref=yt-sloped-site-pdf-survey

🌐 More Revit tutorials: https://corbinteaches.com

━━━━━━━━━━━━━━━━━━━━━━
CONNECT
━━━━━━━━━━━━━━━━━━━━━━
Subscribe: https://bit.ly/3VFqR86
Instagram: https://bit.ly/3J8l6Io
Architecture work: https://bit.ly/3VPUnrJ

Read more >